How do I report my property occupancy to Apartments.com using Yardi?
Reporting Occupancy Using Yardi
Important: Verify that unit lease status is enabled in Yardi before reporting occupancy to Apartments.com.
Reporting Occupancy to Apartments.com using Yardi requires the following:
- ILS & Guest Card Configuration
- Creating a Property List
- Configuring Admin Permissions
- Configuring Your Apartments.com Admin User
- Applying Property Configurations in Bulk
- Adding a Waitlist Unit
ILS & Guest Card Configuration
- Navigate to the Yardi Voyager portal and log in to your account.

- Select Interfaces, Configuration, and then Review Interface Vendors in the left navigation dashboard.

the Interface Configuration page appears.
- Select the Entity Type dropdown and select ILS/Guest Card. Select Submit to continue.

The ILS & Guest Card Configuration page appears.
- Search for and select Apartments.com in the Interface Configuration pop-up.

The Apartments.com ILS & Guest Card Configuration page appears.
- Verify that the Name, Code, and Type fields match the content in the screenshot below. Under the Export Resident / Guest Activity Options, verify that 90 days and Schema v4.0 are selected and that the Use Floor plan data checkbox is unchecked.

- Configure the Export Resident/Guest Activity options to match your preferences.
- Verify that the Export all guest cards, ignore interface association checkbox is checked.
- Verify that your Tenant and Prospect Import/Export options are complete.
- Select Save to finalize ILS & Guest Card Configuration.
Creating a Property List
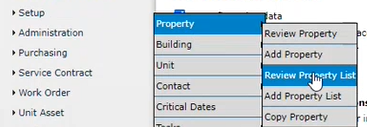
- Select Setup, Property, and then Review Property List in the left navigation dashboard.
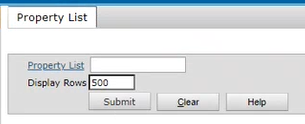
The Property List Page appears.
- Select Submit to continue.
The Property/Entity List page appears.
- Search for an existing property list where you want to report occupancy to Apartments.com and select it.

- Enter .apts in the Property List field and Apartments.com Property List in the Description field.
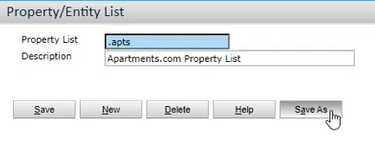
- Select Save As to create an Apartments.com copy of the original property list.
Configuring Admin Permissions
- Select Roles and then Administration in the left navigation dashboard.
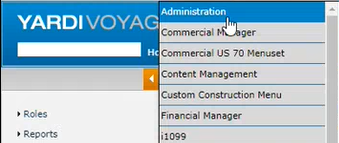
The System Administration page appears.
- Select Add Users under the Security options.
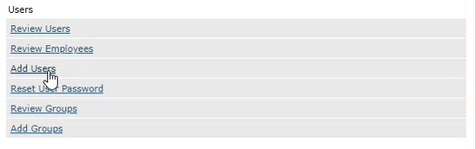
The Employee / User Setup page appears.
- Enter Apartments.com user information in the User Setup fields.
- Enter apts.com in the Code field.
- Enter .com in the Lastname field.
- Enter Apartments in the Firstname field.

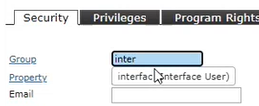
- Enter interfac and select interfac (Interface User) in the Group field under the Security tab.
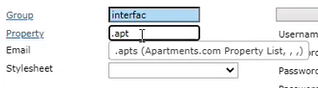
- Enter .apt and select .apts (Apartments.com Property List, , ,) in the Property field.
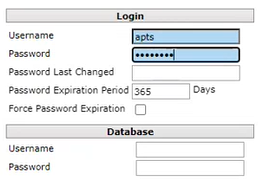
- Enter a username and password for your Apartments.com account. Configure the settings so that your password does not expire.
- Select Save to save your progress.
- Select the Privileges tab and check the Interface User and Receive Stack/SQL Trace Messages boxes.
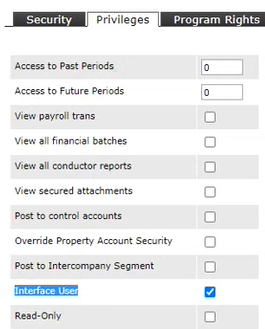
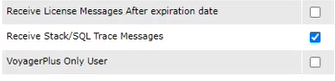
- Select Save to save your progress.
- Select the Program Rights tab and check the Property Mgmt. box.
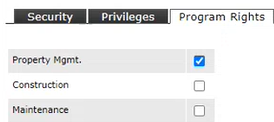
- Select Save to save your progress.
- Select the Regional Settings tab and select us under the Country dropdown.
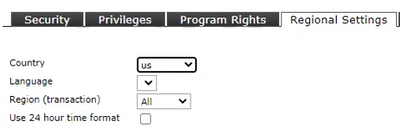
- Select Save. Your Apartments.com admin user is created.
Configuring Your Apartments.com Admin User
Important: After creating your admin user, make sure you grant it Read/Write access to Interfaces: Web Service - ILS/Guest Card. Refer to the steps below for more information:
- Navigate to the main dashboard, locate and select Set Permissions, and then select interface as your group.
The Set Permissions page appears.

- Verify Interfaces: Web Service - ILS/Guest Card is entered in the Description field.
- Set the Access Type to Read/Write.
- Select Least Restrictive from the Set all Permissions dropdown.
- Select Set All and Save.
Your Apartments.com admin user is granted Read/Write access to Interfaces: Web Service - ILS/Guest Card.
Applying Property Configurations in Bulk
- Select Interfaces, Configuration, and then Bulk Property Interface Configuration in the left navigation dashboard.
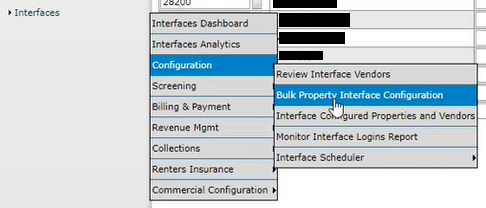
The Interface Configuration page appears.
- Enter .apts into the Property field and select .apts (Apartments.com Property List, , ,).

- Select the Interface Type dropdown and select ILS/Guest Card.

- Verify the Configure/Remove dropdown is set to Configure and Apartments.com selected in the Available Agencies list.
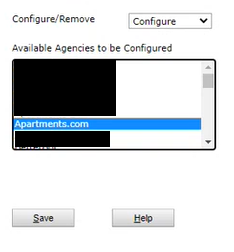
- Select Save to apply all property configurations and start reporting occupancy to Apartments.com.
Adding a Waitlist Unit
Note: Adding a waitlist unit is optional. Following these steps are not required to report property occupancy to Apartments.com using Yardi.
- Navigate to your Basic iData Role. Select Setup, Unit, and then Add Unit in the left navigation dashboard.

The Add Unit screen appears.
- Enter your property code in the Property field, set the Rental Types as Residential, and then select Submit.

The Unit screen appears.
- Enter all relevant unit information including the unit type and then select Save.

Important: The unit code should include the text WAIT before the code itself.
Your waitlist unit is created.
